Rainbow pinata cake combines two fabulous things - cake and candy. Make one for your next Birthday! Recipe in English & Spanish. Receta Ingles y Español.

For at least a week I had the same after work routine.
Come home, change into something more comfortable then mix up another batch of flour and water and carefully apply the newspaper strips to my craft project.
What was it you ask? It was a piñata cake, but not just any pinata cake, a doodle pinata for my friend's hens party.
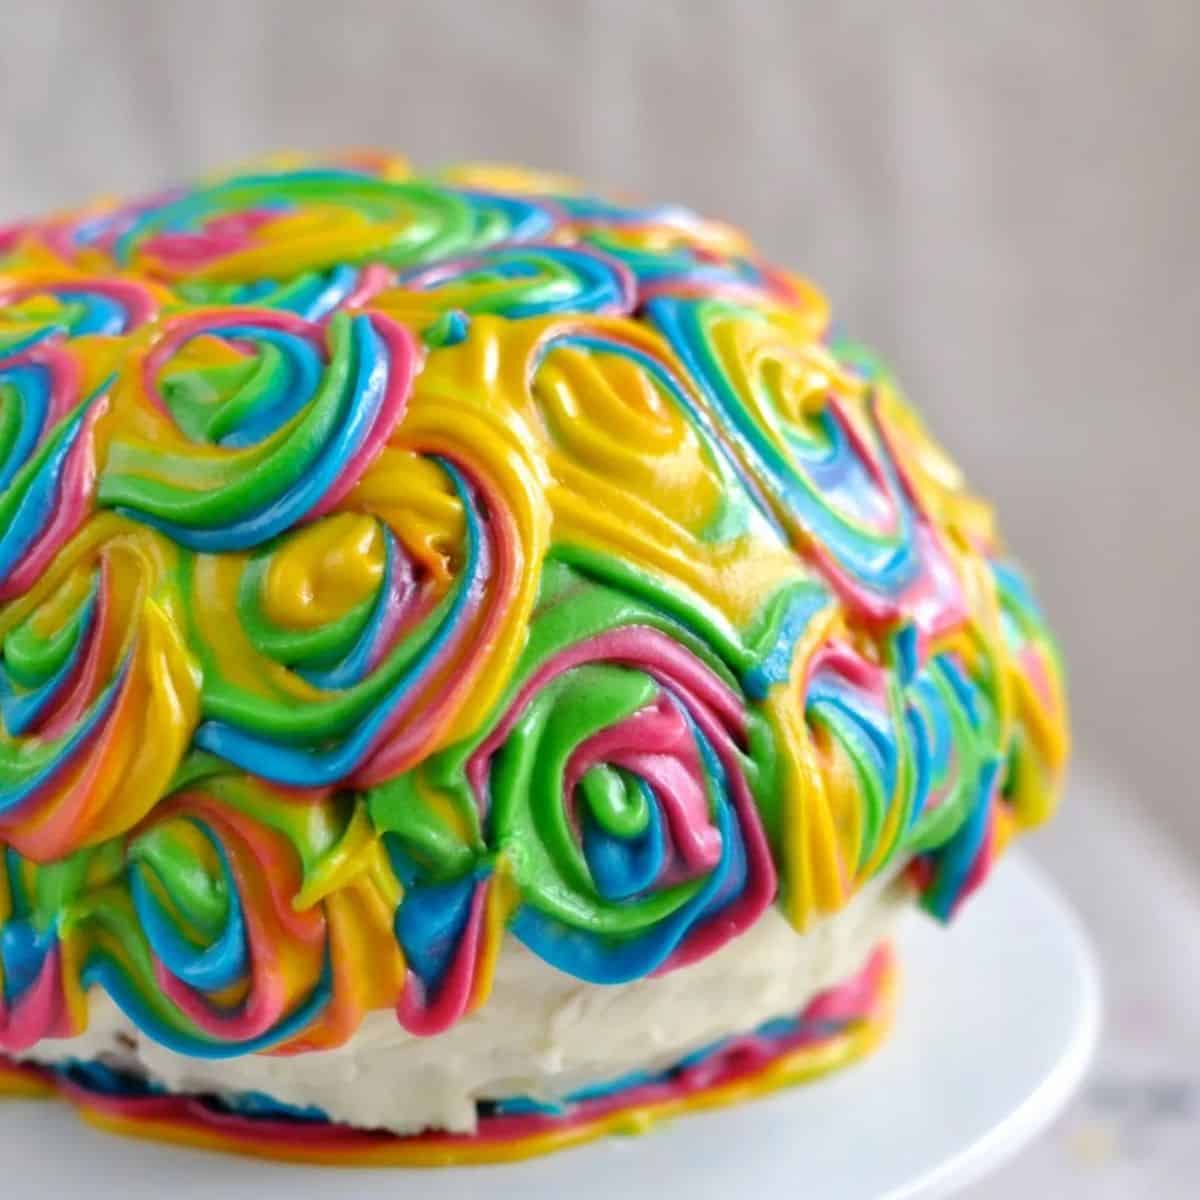
Sadly I can't seem to find any photos of my work of art but you needn't worry because I have a much better looking version for you today.

This rainbow pinata cake is extra special because today is my Birthday!
That's right today is the big 2-8 which means I have just two more years to come up with the-best-cake-ever for my 30th. In the mean time, I'm keen to celebrate this one with a whack bang and hope the celebrations spill over the next few weeks (get it...spill over like the filling in a piñata - oh yes I'm witty on my Birthday!).
A few weeks ago, my sister sent me a pic of a piñata cake and I knew it's what I had to make for my Birthday blog cake.
Just to fill you in, I get a Birthday cake for the day and a Birthday cake for the blog, ok and sometimes I bake an extra cake over the weekend closest.
What can I say, I love mud cake!

My rainbow pinata cake was seriously easy to make and oh so much fun.
The hardest part was probably choosing what to put inside. I settled on mini m&ms and freckles surprisingly fast.
Don't ask me why, they just jumped off the supermarket wall into my hands.


I didn't want the cake to just look fantastic I wanted it to be delicious too so my piñata cake shell is made of macadamia and lime pound cake and iced with lime cream cheese icing.
You could use buttercream icing.
If you're not a fan of lime or macadamia, try out a pound cake recipe. You can really use any recipe you like as long as it's a dense cake so it won't collapse when you hollow it out.
You will need some sort of round dish to bake the cakes in.
I used my pudding tin but had to bake the cakes one at a time and wash it out in between the two.
It wasn't a big deal, but if you have two the same size or can borrow an extra one, it makes it easier.
Side note, someone has invented a Pinata Cake Pan which could be rather handy if you don't have the right shaped cake tin.
Once the cakes have cooled you will need to slice off the top and make sure that they're both the same height so that their circular tops match up.
You may need to trim one down to match.
Then, carefully dig out the middle of each one leaving at least a three centimeter border because you don't want the piñata cake to collapse before it's smash cutting time.
I challenge you to do this part without eating all the offcuts sampling the cake.

Next up, fill one of the halves with your treats of choice - mine were m&ms and Freckles.
You can use whatever you like but don't put anything too big in there or it will be really hard to cut the cake later.
Even the Freckles provided a little bit of a challenge.
You could even try filling it with something like simple quick mulberry jam & cream.

Pipe a thick border of icing around the outside of the base cake.

Then secure the lid.
I then covered mine with a thin coating of white icing to lock in all the crumbs and make decorating easy.
Once that was set it was time for the fun to begin.

To me, it's not really a pinata without crazy colours so I went all out with my vanilla cream cheese buttercream icing (you can use any thick icing that pipes well - here's how to make buttercream icing).
So I could use all four colours at once, I wrapped each one in a plastic wrap sausage and tied off one end and twisted the other end tight.

Then I gathered the twisted (not tied) ends all together and gave them the snip then carefully dropped them into my piping bag fitted with the star icing tip.

After squeezing out a bit of icing to make sure all the colours were coming out together I went to town decorating. Feel free to go crazy with this step. It is a fiesta after all.
My icing was a little bit runny so drizzled down the sides a bit but I wanted it to look like it was draped the way the crepe paper hangs from a paper pinata.
Now for the best bit...

The cutting! I imagine it would be pretty exciting to cut into it if you didn't know it was filled with goodies. Ok, I'll admit it was pretty exciting even though I knew there was hidden treasure inside.
Here are a few more homemade party food ideas:

Recipe
Lime & macadamia Pinata cake
Ingredients
- 250 g 8oz unsalted butter
- 250 g 8oz caster (superfine) sugar
- 4 free-range eggs
- 175 g 5½ oz self-raising flour
- 75 g 2½ oz almond meal (or macadamia meal)
- 1 teaspoon vanilla extract
- grated zest of one lime
- ICING
- 2 tablespoon cream cheese
- 1 tablespoon butter
- 2-3 cups icing confectioner's sugar
- juice of one lime
- food colouring
- chocolate or lollies to fill
Instructions
- Pre-heat the oven to 160C fan-forced.
- Grease a pudding dish and line the bottom (prepare two if you have two the same).
- Place the butter and sugar in the food processor and process until smooth.Scrape down the sides.
- Add the eggs, one at a time and blitz until mixed in.
- Slowly add the flour and macadamia meal then once they're mixed in add the lime zest and vanilla.
- Scrape the sides down again and process for a few seconds to incorporate the scraped bits.
- Divide the batter in half and pour half into each pudding dish (or save the other half for later).
- Bake for 45-55 minutes or until a cake tester comes out clean.
- Leave the cake to sit in the tin for 5 minutes and then transfer to a wire rack to cool completely.
- Clean out the tin and repeat with the rest of the batter if you're only using one tin.
- IcingBeat the butter and cream cheese together in the bowl of an electric mixer until smooth and creamy.
- Slowly add the icing sugar then the lime juice and beat until it is light and fluffy.
- You may need to add a little water or icing sugar to get it to the right consistency.
- Hollow out the middle of the cooled cakes and fill one half with your goodies.
- Pipe icing around the edge of the cake and place the 'lid' on top and press to secure.
- Ice the cake with a thin layer of icing.
- Divide the remaining icing into however many colours you would like and tint them with food colouring.
- Wrap the icings up in plastic wrap to form a sausage and twist and tie it off at one end and twist the other end tightly.
- Gather all the twisted ends together and snip them with scissors then drop them, snipped end first, altogether into piping bag fitted with a start tip.
- Press from the end of the bag to squeeze out all the colours at once and decorate the cake with icing.
- Leave to set.
Nutrition
Recipe

Ingredients
Torta
- 250 g mantequilla sin sal
- 250 g azucar muy fina
- 4 huevos
- 175 g harina con levadura
- 75 g harina de almendras
- 1 cucharadita de vainilla
- ralladura de una lima
Guinda
- 2 cucharas de sopa de queso crema
- 1 cuchara de sopa de mantequilla
- 2-3 tazas de 250g de azucar en polvo
- jugo de una lima
- colorante
- puqueños chocolates y caramelos para rellenar el centro de la torta par a hacer 'la piñata"!
Instructions
Torta
- Pre calentar el horno a 160oC (ventilador forzada).
- Engrasar con mantequilla un plato de pudin (como 18cm x 9cm) o dos si tiene dos iguales.
- Batir la mantequilla y azucar hasta que esten bien mezcladas.
- Anadir los huevos una a una.
- Despaciamente añadir la harina y la harina de almendra, ralladua de lima y la vainilla.
- Batirlo bien encorporandolo todo.
- Dividir la masa por la mitad y si tiene 2 platos de pudin echar los dos o guardar la mitad para cocinar despues del primer plato de pudin.
- Ponerlo al horno para 45-55 minutos probandolo a ver si esta hecho.
- Dejarlo 5 minutos en el plato despues transferiendolo a una sitio para enfriarse.10. Repetir puntos 7-9 si es necesario para cocinar la otra mitad de la masa.
Guinda
- Batir la manteqilla y queso crema con una maquina electrica hasta que este bien mezclada y suave.
- Añadir el azucar en polvo hasta que este bien lijera.
- Puede necesitar añadir un poquito de agua si esta demasiado espeso.
- Invertir la torta. Hace un hoyo en la base de cada torta y rellenarlos con los caramelos.
- Poner un poco de la guinda por el borde de la torta y con mucho cuido invertir la una al otra apretandolo para fijar las dos tortas juntas haciendo un globo.
- Cubrir la torta con la guinda.
- Compartir el resto de la guinda en cuarto cantidades y mezclar con 4 colores distintos.
- Envolver los 4 porciones separados en plastico formando como una salchica a cada y atandolo a un extremo y enrociendolo muy fuertemente el otro.
- Coger los cuarto extremos enrociendolos juntos y con unas tijeras cortar los 4 extremos juntos y al mismo momento bajandolo en una manga pastelera que tiene boquilla de estrella puesta par despues cubrir la torta con los cuatro colores de guinda.
- Dejarlo establecer.
- Buen fiesta!!


Dawn says
Wanting to make this cake filled with m&ms for my son's 10th birthday. My question is can I fillet decorate it two days in advance or will the M&Ms get soggy and discolored ?
Claire says
Hi Dawn. I couldn't tell you 100% I'm sorry. There is a chance that they could lose their colour. I would suggest making the cakes and you could make the icing and wrap them up in the plastic wrap two days in advance and then assemble it all on the day.
Elise Moloney says
Hi Claire, My eyes are blown away by this cake; if it's possible to be starstruck over a cake well then i have been by this one. Anyway I was wondering for the swirl icing of the cake, is it hard to combine all the colour together??
Thanks Elise
Claire says
Hi Elise. Haha thanks! Nope the icing isn't difficult at all if you use the plastic wrap trick. Good luck!
Funny Bunny says
Love it! you've just given me an amazing idea :) I'm hosting the family's New Year bash, so I recon I'll be making this cake in Christmas-y colours as the centre piece on the table! maybe spray it with a bit of silver shimmer after its fully iced...sprig of holy...the ideas are endless! Ohhhhhh, I am oh so excited now, thanks!
Claire says
Oh please please please would you share a photo of the finished cake on my Facebook page? I would LOVE to see it. Great idea!
Funny Bunny says
Will do. :-D
Wine and lipstick says
I think this is the best cake that I've seen in a looong time. I love it, can't wait to make this myself!
Claire says
Thanks!
Sharon Mackenzie says
Hi your cake looks amazing and I would so love to make it for my daughter's birthday, she is not very well at the minute so can't have a party and I think this cake would cheer her up very much. The only thing is I'm one of these people that isn't very good at just following a recipe and pictures, I actually need to see it done to be able to replicate, daft I know but unfortunately that's how it is with me. What I was wondering is do you have an actual video tutorial out so I could watch how you make this cake ? I really hope so as this would definitely make Leah's day if I was able to make her this. Also I cannot join your newsletter link for some reason would you please be able to add me. Thank you, and once again congratulations on such a stunning cake.
Sharon.....
Claire says
Hi Sharon. Thanks so much! Unfortunately I don't have an actual video of it being made but if you'd like to email me to [email protected] I can help you as much as I can. I only have the photos of it being put together but feel free to ask as many questions as you like. You can do it!