
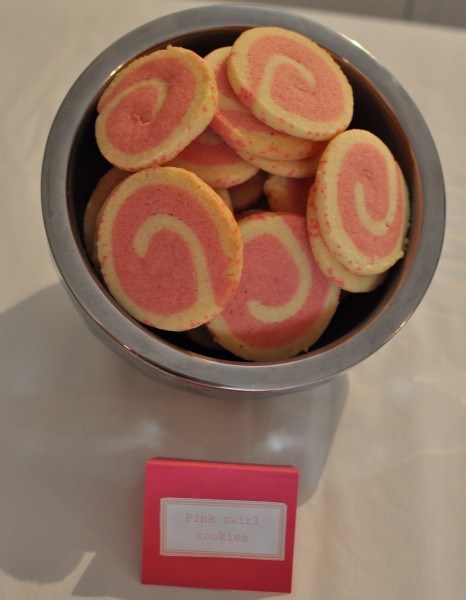
After today you might start to see a theme. When I host an event, I try to find easy but delicious and pretty recipes. I've learned the hard way that tricky, intricate recipes + hosting = stressed out Claire so simple is the way I go. If any of the work can be done in stages so it seems even easier then that's a bonus. Pink swirl cookies most definitely fitted the bill.

They look fantastic. They use really simple ingredients. They are easy to make. You can even make the dough weeks in advance and freeze it and they taste great. Could they be any more perfect?

The biscuits dough for these cookies is a pretty basic sugar biscuit. I think you could use the concept for any recipe you have as long as it's one that results in a reasonably firm dough. My gingerbread recipe would be delicious!

I think you know the drill by now - beat the butter and sugar together until they're light and fluffy.

Scrape down the sides of the bowl and add the egg and vanilla then beat them through.

Sift in the dry ingredients and keep beating until the dough all comes together. I didn't need to change to the dough hook for this step. You should be fine with the beater.

Remove half the dough from the bowl and roll it into a bowl. Add some pink food colouring to the remaining dough and use the mixer to stir it until the colour is nice and even. Of course you could use any colour you like at this stage. A bit of melted chocolate would be rather nice too. Or you could use green colouring with a drop of peppermint essence.

Lay out two large pieces of baking paper on the bench and place a dough ball on each one.

Then it's time to roll the dough out. I found it easier to pat it down first into a rough rectangle then get to work with the rolling pin. Use a sheet of baking paper over the top of the dough to stop the rolling pin from sticking.

Once the two sheets of dough are roughly the same size, use the baking paper to gently lift the pink dough on top of the plain dough.

Trim the sides of the dough so it forms a neat (ok sort of neat) rectangle.

Yes I kept the leftovers.

Very carefully roll the dough into a log. If you've ever made sushi before, you use the baking paper the same way you use a sushi mat. Gently but firmly roll it up making sure it is as tight as possible. Spread your chosen sprinkles on a tray and roll the dough log in the sprinkles. You don't want to do this straight on the bench unless your idea of fun is picking up sprinkles from every corner of the kitchen for a few weeks.

Wrap the dough log up in plastic wrap so it's nice and tight.

This was a new trick I learned from this recipe. If you rest the dough in two glasses it stops it from getting a flat bottom. Just be sure to put something in front of it in the fridge so it doesn't roll out. The dough needs to be refrigerated for at least 2 hours. I left mine overnight.
Alternatively, the dough can be frozen at this stage so you have fresh dough ready to go.

Now of course I wasn't going to waste those off-cuts. I separated them into 6 parts and gently rolled them into a marble ball.

I then flattened each one out and baked them at 160C fan-forced for about 10 minutes.


Once the dough is firm, take it out and slice it up into 1cm thick pieces. Lay them out on a baking paper lined tray leaving at least 2cm between each piece of dough. Bake the cookies at 160C fan-forced for 8-10 minutes or until they turn golden. You do not want to over-cook these or the pink will turn an ugly colour.

Leave the baked cookies to rest on the tray for 5 minutes.

Transfer them to a wire rack to cool completely.

Serve them up straight away or store them in an air-tight container for up to 3 days. Enjoy!
What about you? Do you go for super-fancy recipes or do you keep it nice and simple when you entertain?
Recipe
Ingredients
- 125 g 4.4oz butter, softened
- 1 cup caster superfine sugar
- 1 egg
- 1 teaspoon vanilla extract
- ¼ teaspoon salt
- ½ teaspoon baking powder
- 2 cups plain AP flour
- Pink gel color
- Sprinkles
Instructions
- In the bowl of an electric mixer, beat the butter and sugar together until creamy. Add the egg and vanilla and beat them through.
- Add the rest of the dry ingredients to the bowl and beat them through too until the dough comes together.
- Remove half the dough from the bowl and set it aside. Add the food colouring to the dough left in the bowl and beat it until the colour is even.
- Lay two big sheets of baking paper on the bench and place a ball of dough on each one.
- Lay a sheet of baking paper over the top of the dough and roll each one out into a large rectangle.
- Place the pink dough on top of the white dough.
- Trim the doughs so they form a perfect rectangle and then very gently, from the long side, roll them together using the baking paper as a lifter.
- Keep the off-cuts and use them to make marble cookies.
- Pour the sprinkles onto a large tray and roll the dough log in the sprinkles.
- Wrap the dough in plastic wrap and refrigerate it, resting in two glasses, for at least 2 hours. Alternatively the dough can be frozen for later use.
- Pre-heat the oven to 160C (320F) fan-forced and line two baking trays with baking paper.
- Cut the dough into 1cm thick pieces and place each slice on the lined tray leaving at least 2cm between each one.
- Bake the cookies for 8-10 minutes or until they start to turn golden at the edges.
- Leave them to rest on the trays for 5 minutes and then transfer to a wire rack to cool completely.


Sandra says
Love the tip about putting the dough in glasses, priceless!
Claire says
It's so clever isn't it. When I saw it it was one of those 'of course.. why didn't I think of that?!?!' moments
Erin@TheFoodMentalist says
These look so dainty and pretty :)
Claire says
Thanks Erin!
Jennifer (Delicieux) says
Those cookies are so cute!!! I love the tip about resting the dough in glasses. I am going to have to try that as my dough always gets flat. Thanks for sharing!
Claire says
It's a great idea isn't it. I used to always put the straight in the fridge and they'd have one straight side.
Lorraine @ Not Quite Nigella says
They are so cute! And yes I'm with you-the less I have to do on the night the better! :D ANd making the dough weeks ahead=even better! :P
Claire says
I think the less-is-more theory applies to a lot of situations really!
[email protected] says
Pretty pink cookies! I love to keep it nice and simple but I will make sure they will remember it. =)
Claire says
Thanks! That's exactly it. Noone needs to know how easy something was just that it looks and tastes great!
Daisy@Nevertoosweet says
I'm totally with you! When I have friends over and I'm hosting I never make anything too difficult because the worse would be stressing over food and rushing in and out of the kitchen. I want to be able to enjoy talking and eating with my friends to :)
I honestly never knew it was so easy to make pink swirl sugar cookies!!! Thanks for sharing :D
Claire says
You are very right. Why have people over if you don't get to see them?!
Rachel @ Not Rachael Ray (Soon to be Rachel Cooks) says
They turned out so cute! The recipe was actually one of Rachel's (from http://www.BakedbyRachel.com), it was a guest post on my blog.
Claire says
Thanks Rachel. I'll have to stop by Rachel's blog too.